How Are Things Connected?
Switches Lesson Plan
Overview
Materials, Tools & Template
Key Concepts
Instructions
Wrap-Up
Project Gallery
Education Standards
Overview

Grades: Elementary (Grade 3+)
Estimated Time: 180 mins
Lesson Objectives: Build circuits with DIY paper switches. Design an interactive light-up paper project. Learn how a switch works.
Make interactive light-up projects with LED lights and DIY switches and represent things that are connected. This guide introduces circuits with different types of DIY switches and Chibitronics LED light stickers. The students will be able to explore and identify things that are connected and represent them using an interactive paper based light-up project. Suitable for grades 3 and up.
Materials
- LED light Stickers
- 1 or more coin cell batteries (3V)*
- Binder clips
- Conductive copper tape**
- DIY switch template from Circuit Sketchbook
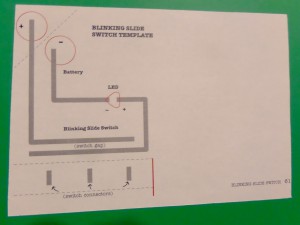
- Blinking Slide Switch template from Circuit Sketchbook
Chibitronics Products
• Classroom Pack of Red, Yellow and Blue LED stickers
• Classroom Pack of White LED stickers
Tools
- Drawing supplies
- Scissors
- Additional craft supplies (if needed)
*Store your batteries separately, and away from other bits of metal. This avoids accidental connections that can drain the batteries.
**The edges on the copper tape can be sharp. Watch your fingertips!
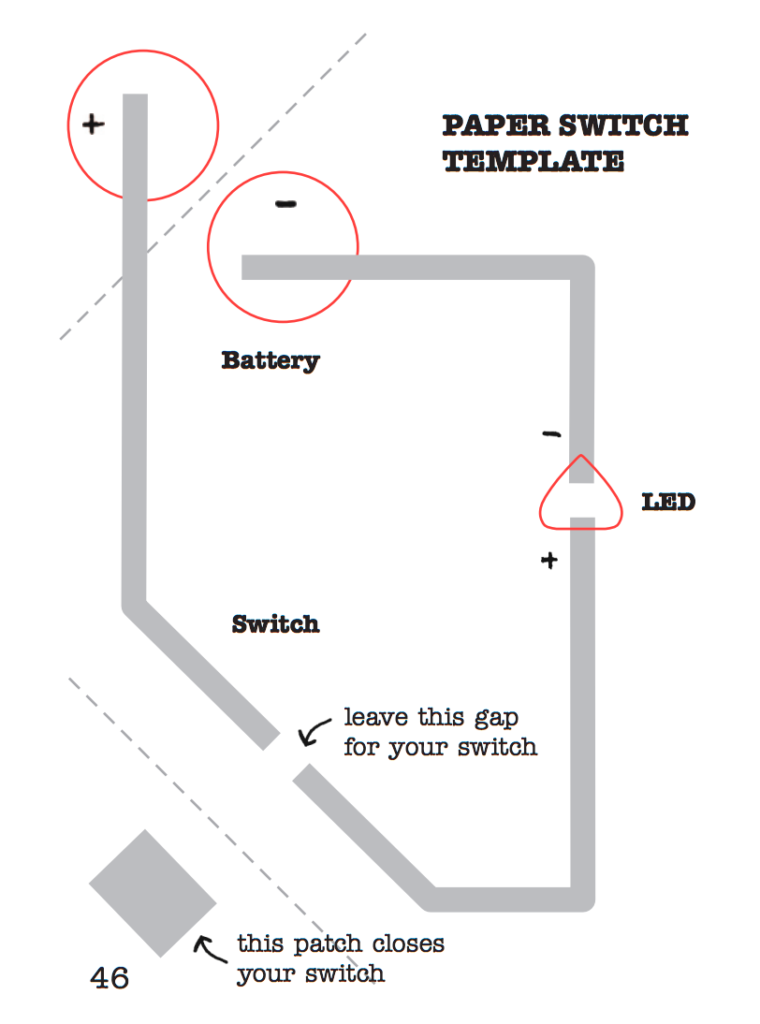
Template
Key Concepts
Part 1
- Switch (Please refer to the Circuit Sticker Sketchbook Chapter 3)
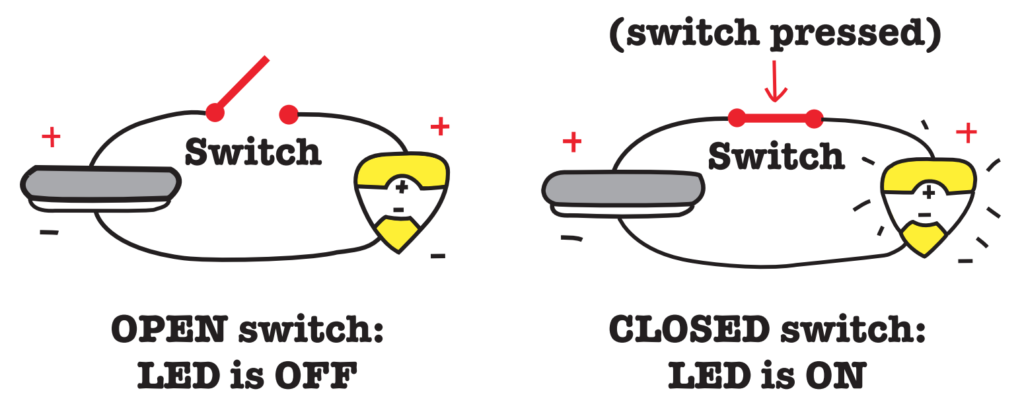
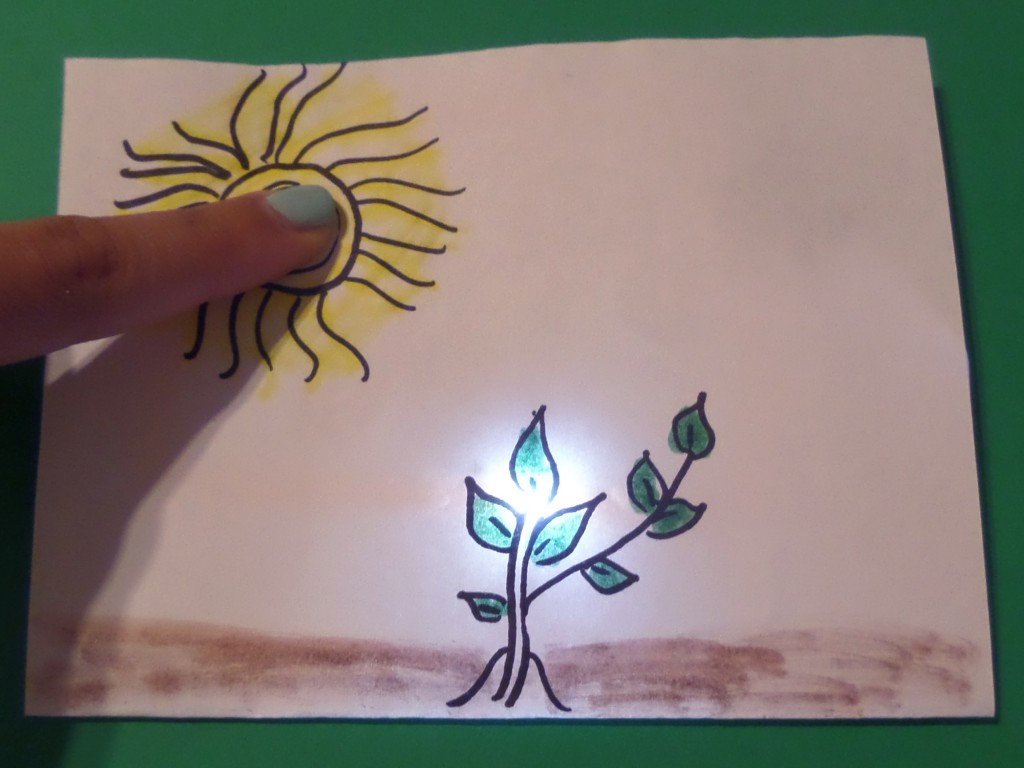
You can make your projects interactive by using a switch to control your lights! A switch is a gap in your circuit that can be connected and disconnected using another piece of foil, turning things on and off.
When the switch is closed the light turns on because the loop is complete and electrons will flow through your circuit. When the switch is open, electrons cannot find a closed loop; so, they will stop flowing, and the light will turn off.
Part 2
- AND/OR Switch logic (Please refer to the Circuit Sticker Sketchbook Chapter 3)
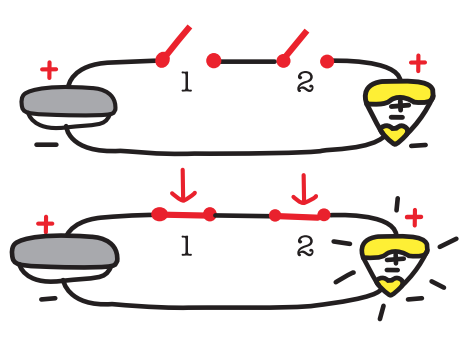
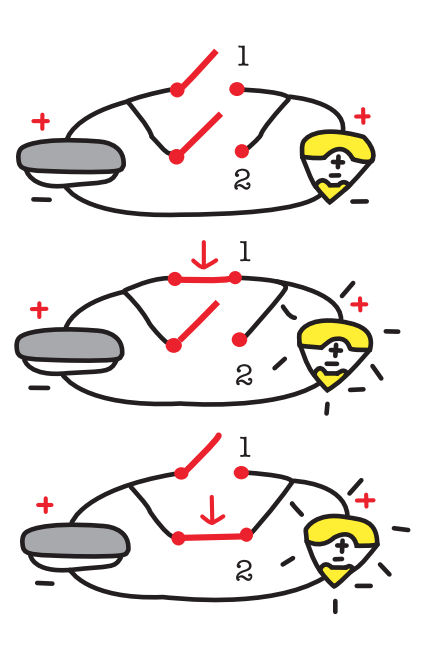
If you put multiple switches in a single loop (“in series”), you have to press all the switches at the same time to turn on your light. This is called a logical AND because you have to press Switch 1 and Switch 2 to make a complete circuit.
You can also connect multiple switches using different branches (“in parallel”), so that pressing any one of them will turn on your circuit. This is called a logical OR because you can press Switch 1 or Switch 2 to make a complete circuit.
Part 3
- Blinking Slide Switch (Please refer to the Circuit Sticker Sketchbook Chapter 4)
You can craft all sorts of switches that open and close gaps in the circuit, or even combine them to create more complex switches.
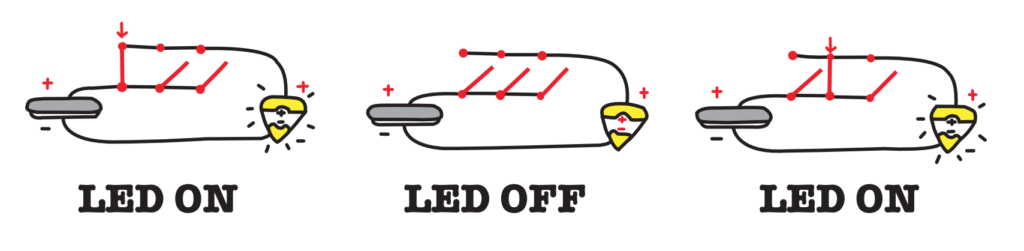
In the blinking slide switch, there is one long gap and multiple places you can press to close the circuit. This is an implementation of the “OR” switch logic (see above)
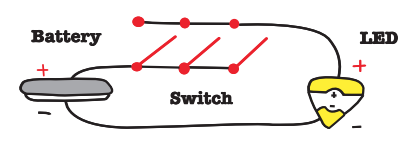
Here, as you press down and slide your finger along the switch, the gap opens and closes, causing the light to blink on and off!
We encourage you to first let the students try making these circuits. You could introduce these concepts as they are making their projects, explain while you are helping them troubleshoot or revisit them at the end of the session.
Instructions
Part 1: Make a paper push-button switch that turns an LED light on when you press the button!
0. Create an example of your own interactive light-up project with different DIY switches. Share your projects with your students.
1. Revisit basic circuit. Ask the students what they recall about their first circuit.
2. Pass around the DIY switch template, copper tape, battery, LED light sticker and binder clip. Refer to this tutorial to make the circuit with a push-button
3. Once the circuit is complete and working, have the students quickly share them with each other. You could use this step as an opportunity to provoke questions and also encourage the students to share their questions with the group.
Question Prompts:
• Describe what… ?
• What would happen if …?
• Why do you think that …?
• How would you…?
• Remember to ask, “What questions do you have?”
If their circuits are not working, give students opportunities to troubleshoot. Ask them to check if their connections are strong enough.
Creative prompt:
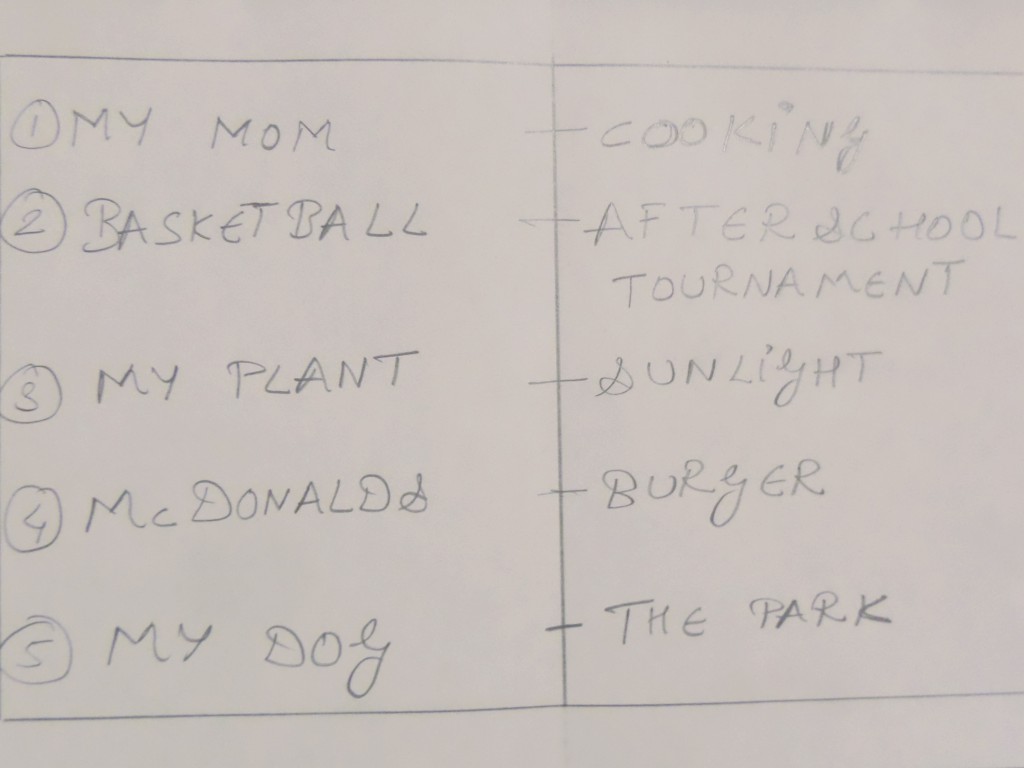
Ask students to draw two columns on a sheet of paper. In the first column make a list of something/someone they like. The list could include objects, people and places.
Eg: My mom, basketball, snow, my plant, McDonalds, my dog etc.
In the second column ask them to write something/someone that have a connection with what they have in the first column. These connections could be literal or metaphorical.
3. Have the students quickly share their list with their peers.
4. Ask students to choose a combination from their two column notes.
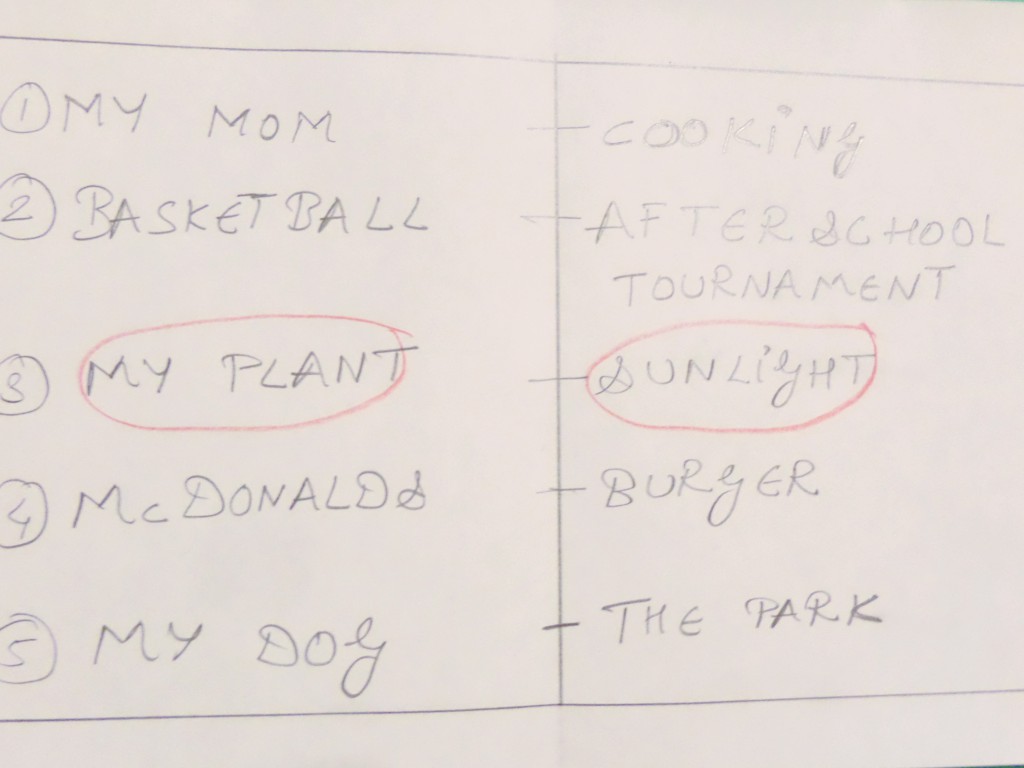
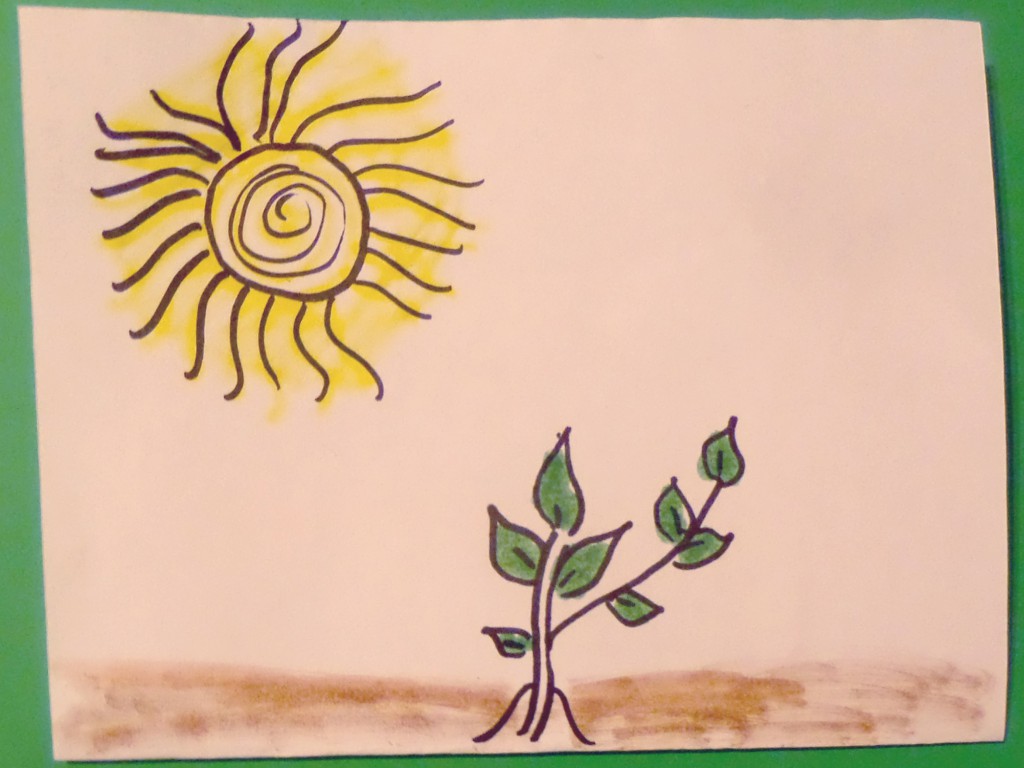
5. Ask them to fold their switch circuit template and make a drawing of the selected objects/people/places from the list. They could align one thing with the switch and other with the LED light.
6. And you are done! Encourage students to share their light-up connections and relationships.
If students are comfortable with creating circuits, you could encourage them to try making a switch with a circuit with multiple LED lights.

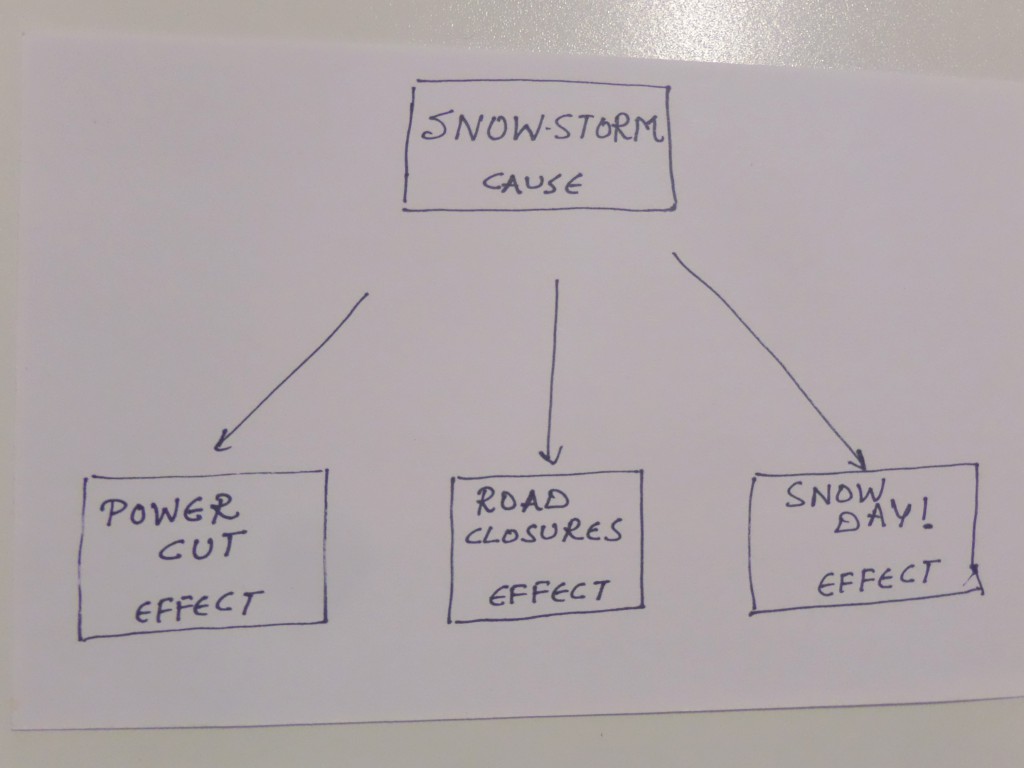
This activity can be used to explore cause and effect relationships.
Part 2: Explore And/OR switches (see key concepts): Using the same theme of connections and relationships encourage the students to try the And/OR switches. You could divide the class into two groups. One group could try creating the AND switches and another could make the OR switches.
Part 3: Create Blinking Slide Switch (see key concepts): This is a really exciting and interactive circuit. You can combine multiple switches together to create blinking effects.
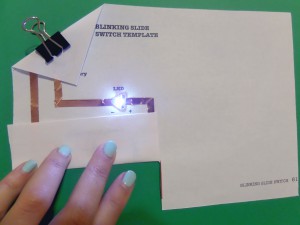
1. Show the students an example of a blinking slide switch. As you slide the finger along the switch, the LED light with blink on and off.
2. Ask students to brainstorm a list of things that comes to their mind when they see the blinking switch. For eg, eyes blinking, stars twinkling, candle flame etc.
Creative prompt:
• This circuit reminds me of…
3. Pass around the Blinking Slide Switch template, copper tape, battery, LED light sticker and binder clip. Refer to this tutorial to make a circuit with a blinking LED.
4. After their circuits are complete and working, ask the students to fold their template and make a drawing of something that reminds them of the blinking gesture.

Wrap-Up
- Encourage students to share all their projects with a group and give each other feedback.
- Ask students to compare and contrast different types of switches
Make sure to notice children’s engagement and process while doing this activity. Listen to their ideas and ask them questions about their creations.
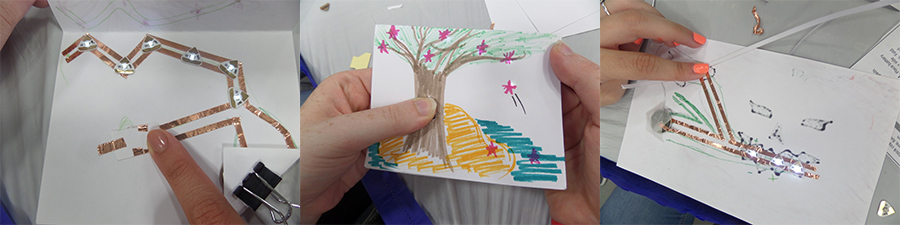
Project Gallery
Alignment to Standards
We think the following standards are most relevant to this activity. You could adapt this list for your class session. The complete list of all the standards can be found on the respective websites of each framework.
- Creativity and innovation- Students demonstrate creative thinking, construct knowledge, and develop innovative products and processes using technology.
a. Apply existing knowledge to generate new ideas, products, or processes
b. Create original works as a means of personal or group expression - Technology operations and concepts- Students demonstrate a sound understanding of technology concepts, systems, and operations.
c. Troubleshoot systems and applications
- Practice 1 Asking questions and defining problems
- Practice 6 Constructing Explanations and Designing Solutions
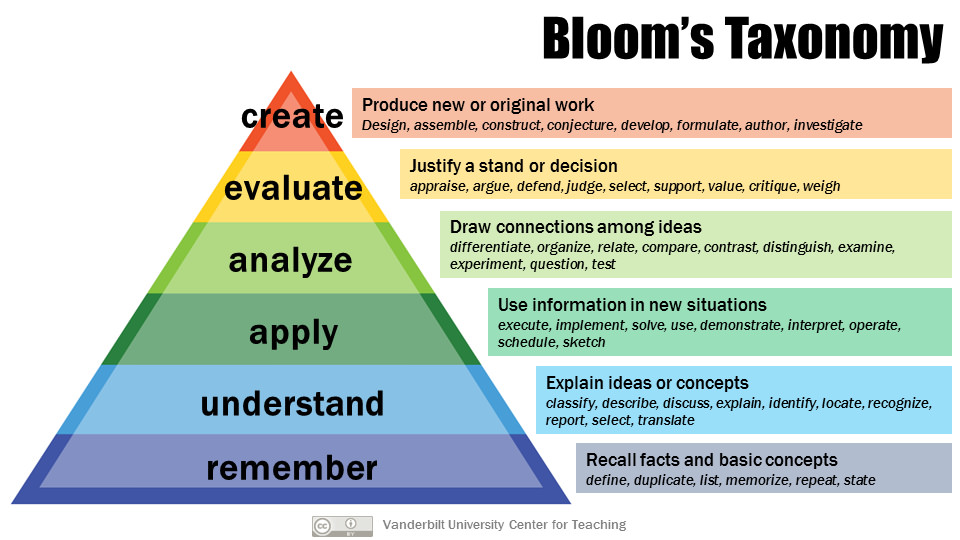
You could also refer to Bloom’s Taxonomy as part of your classroom assessment.