Hi, friends! This is June.
It’s time for sharing a new monthly project with me here.
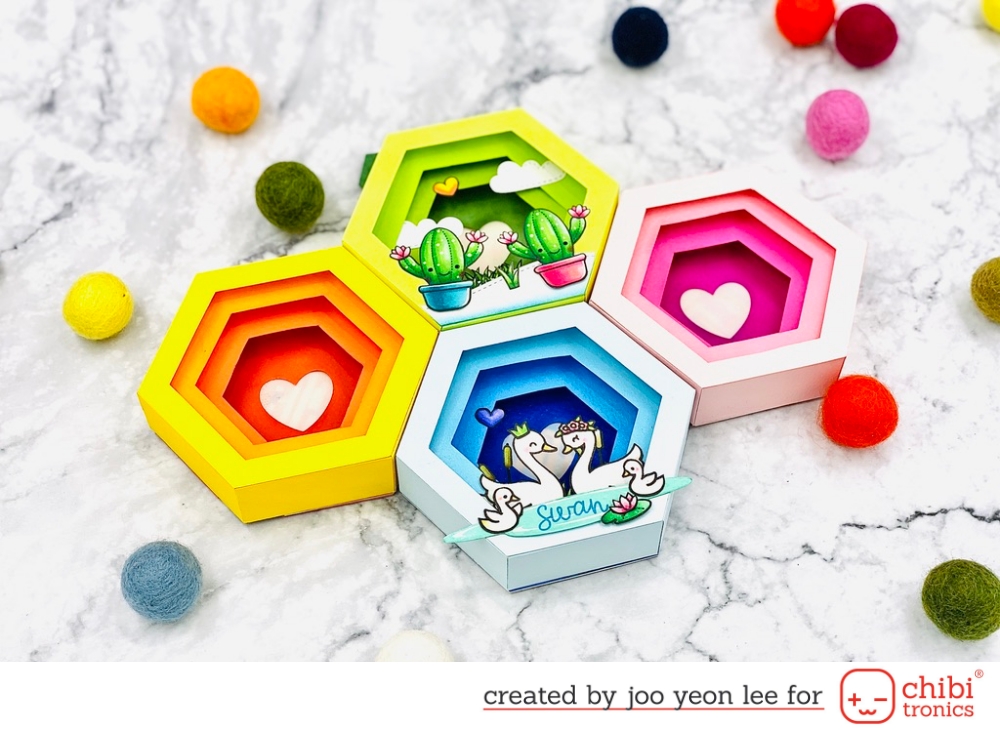
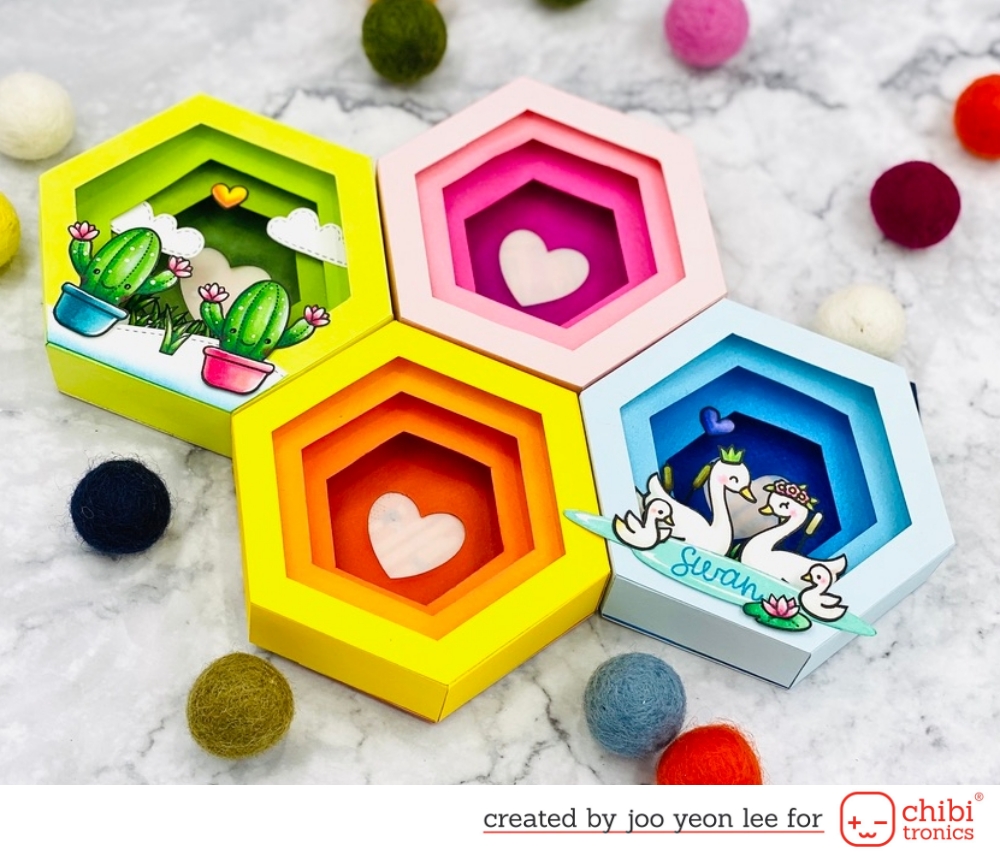
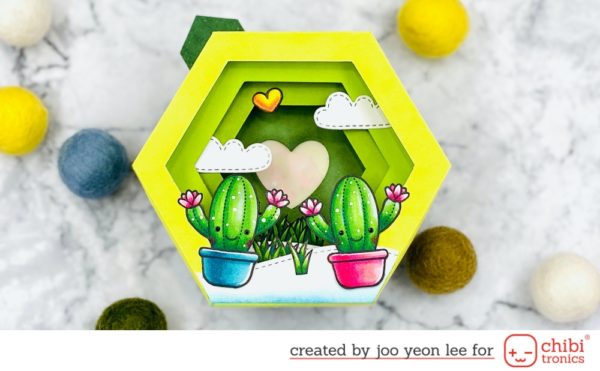
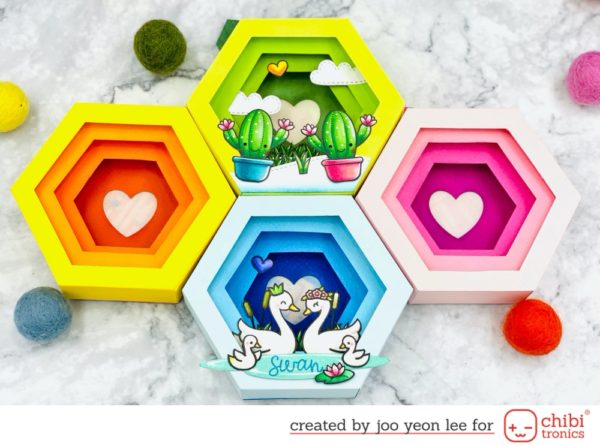
I absolutely love shadowbox and tunnel cards, because both of them create a three dimensional scene with a sense of depth.
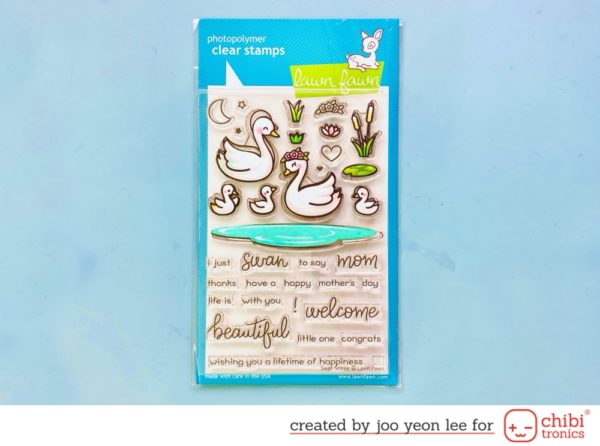
The project that I am going to sharing is the shadow box featuring an adorable stamp set SWAN SOIREE from Lawn Fawn. Of course this shadowbox is also a paper circuit with Red and Green LED’s Sticker from Chibitronics. If you pull the tab on top of the box you can see light-up on the background.
1. Download Template
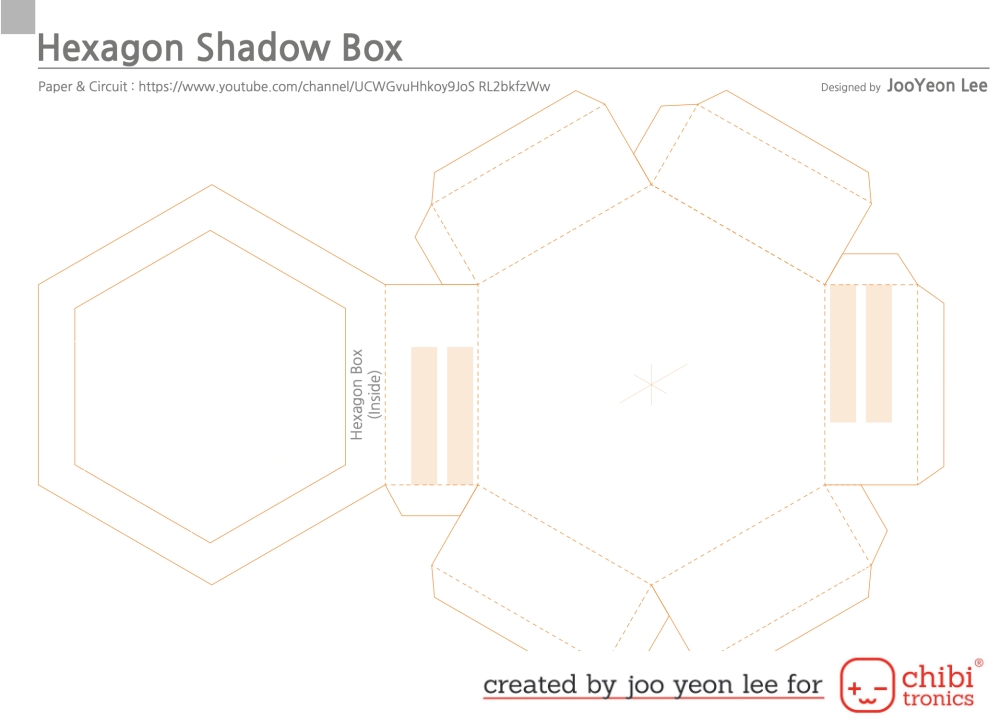
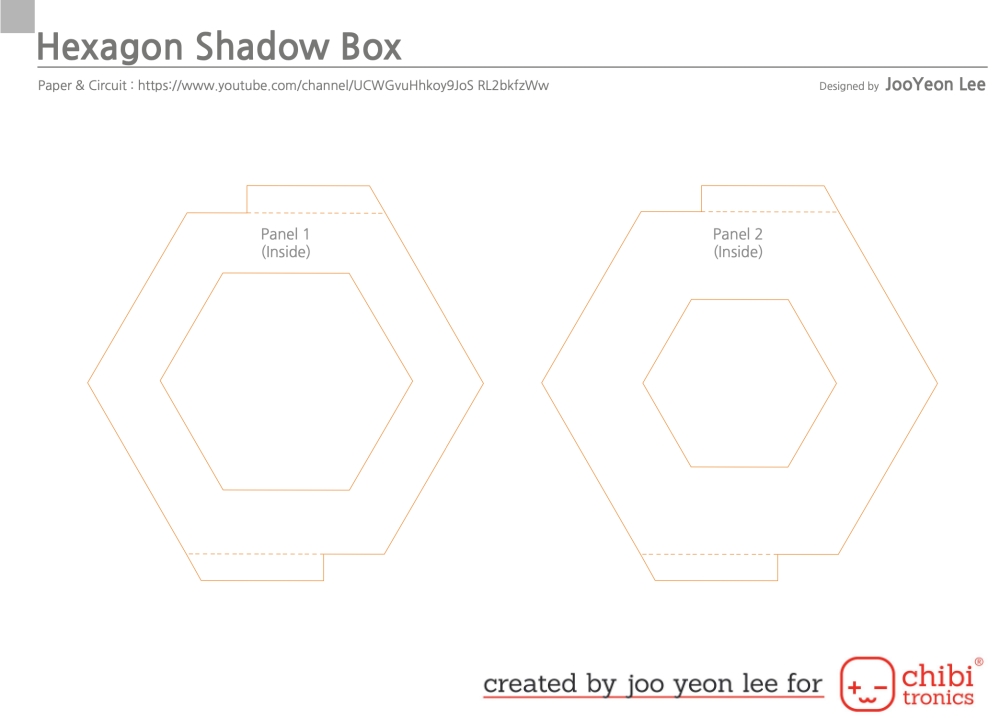
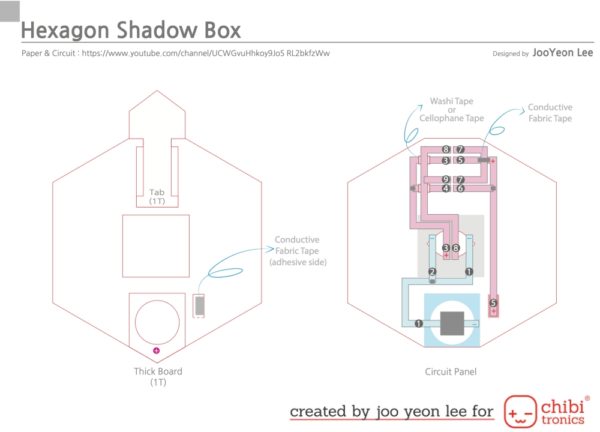
The template shared above is an instructional material that make this task easier to follow. It takes a lot of effort to make this kind of thing and takes days, but I’m so happy sharing this to educate my paper circuit.
2. Stamping & Coloring
3. Building a Circuit
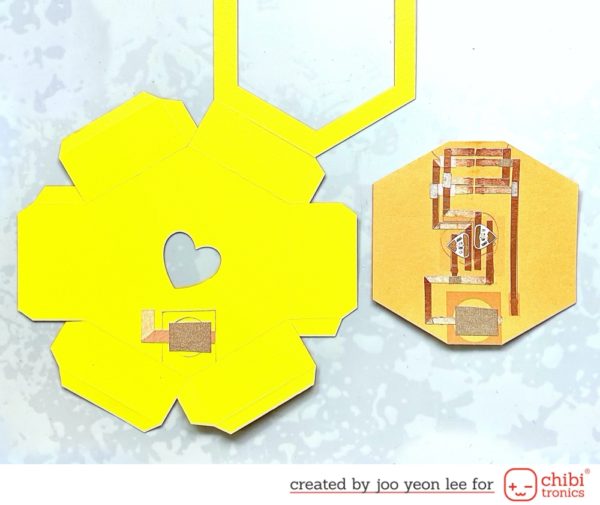
3. Coloring Each Layer

4. Assembly
5. Create Scene
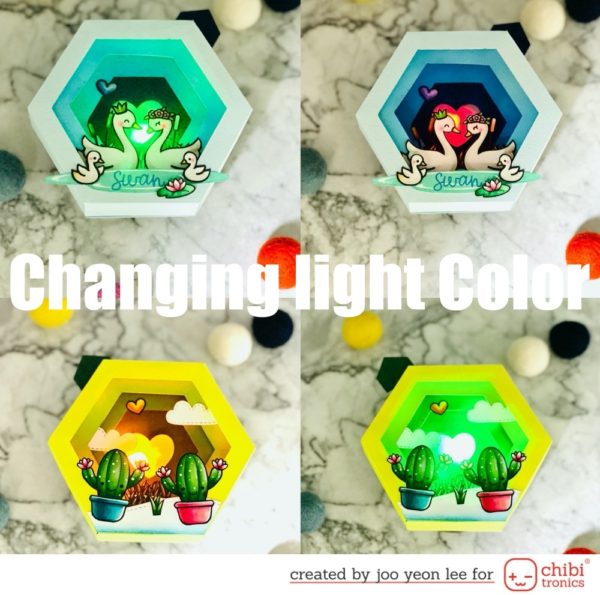
Don’t forget to check if the LED’s turn on by changing its color.
I hope that you like my card and thanks so much for stopping by!
Happy day!
Instagram : paperandcircuit
supplies
- Hexagon Shadow Box Template
- Red LED’s Sticker from Chibitronics
- Green LED’s Sticker from Chibitronics
- Copper Tape from Chibitronics
- 3V coin battery (2016)
- Conductive Fabric Tape
- Lawn Fawn SWAN SOIREE Clear Stamps
- Lawn Fawn YEAR TEN Clear Stamps
- Lawn Fawn STITCHED PARTY BANNERS Lawn Cuts Dies
- Lawn Fawn FLIPPIN’ AWESOME ADD ON Custom Craft Dies
- Hero Arts Nesting CIRCLE DIES
- Altenew TURQUOISE, TIDE BLUE AND STARLIGHT Crisp Dye Ink Pad
Hexagonal Shadow Box