
Use the light sensor sticker to control the brightness of your LEDs with the light sensor.
The light sensor sticker has three pads: + and – for power and a signal pad that generates the pattern. The more light the sticker is exposed to, the higher the voltage on the signal, which causes the lights to become brighter or dimmer, depending on how it’s connected.
To make your LEDs get brighter with MORE light connect them from signal to –
To make your LEDs get brighter with LESS light connect them from + to signal
Follow the tutorial below to create a test circuit for your light sensor sticker.
TOOLS AND MATERIALS
- Light Sensor sticker
- LED stickers
- Copper foil tape
- Coin cell battery
- Binder clip
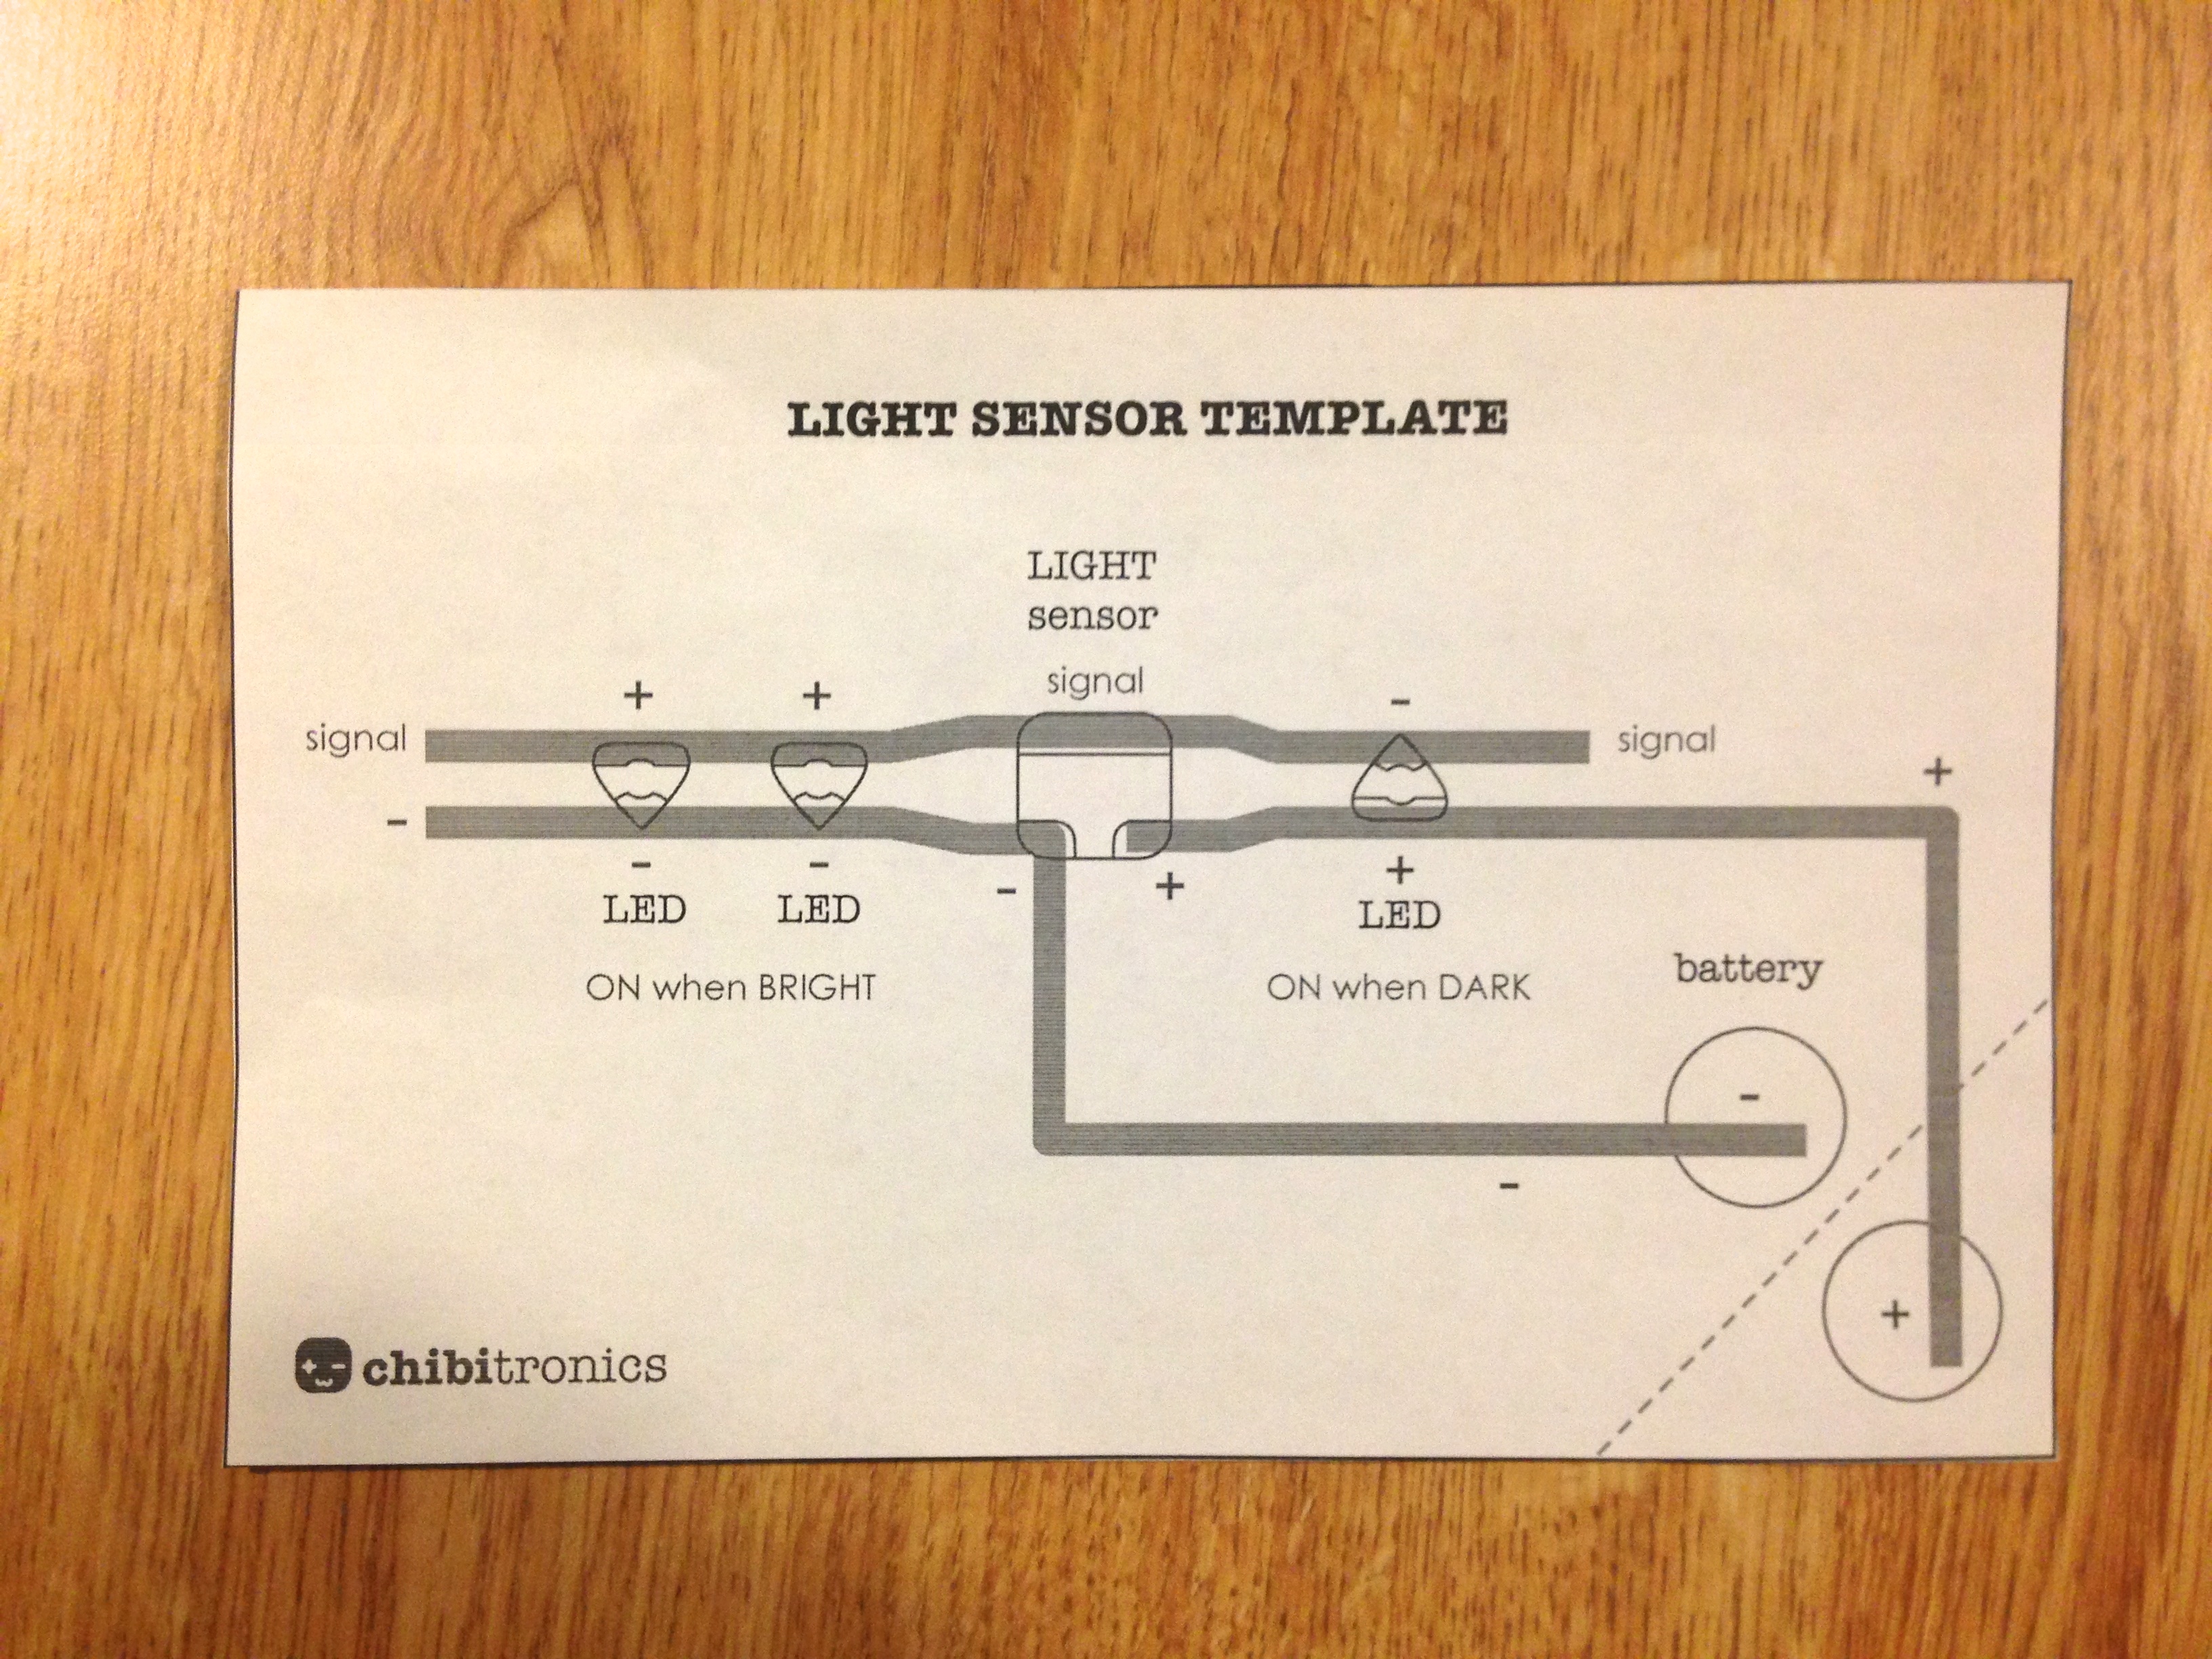
STEP 1: Download and print the Light Sensor Template:
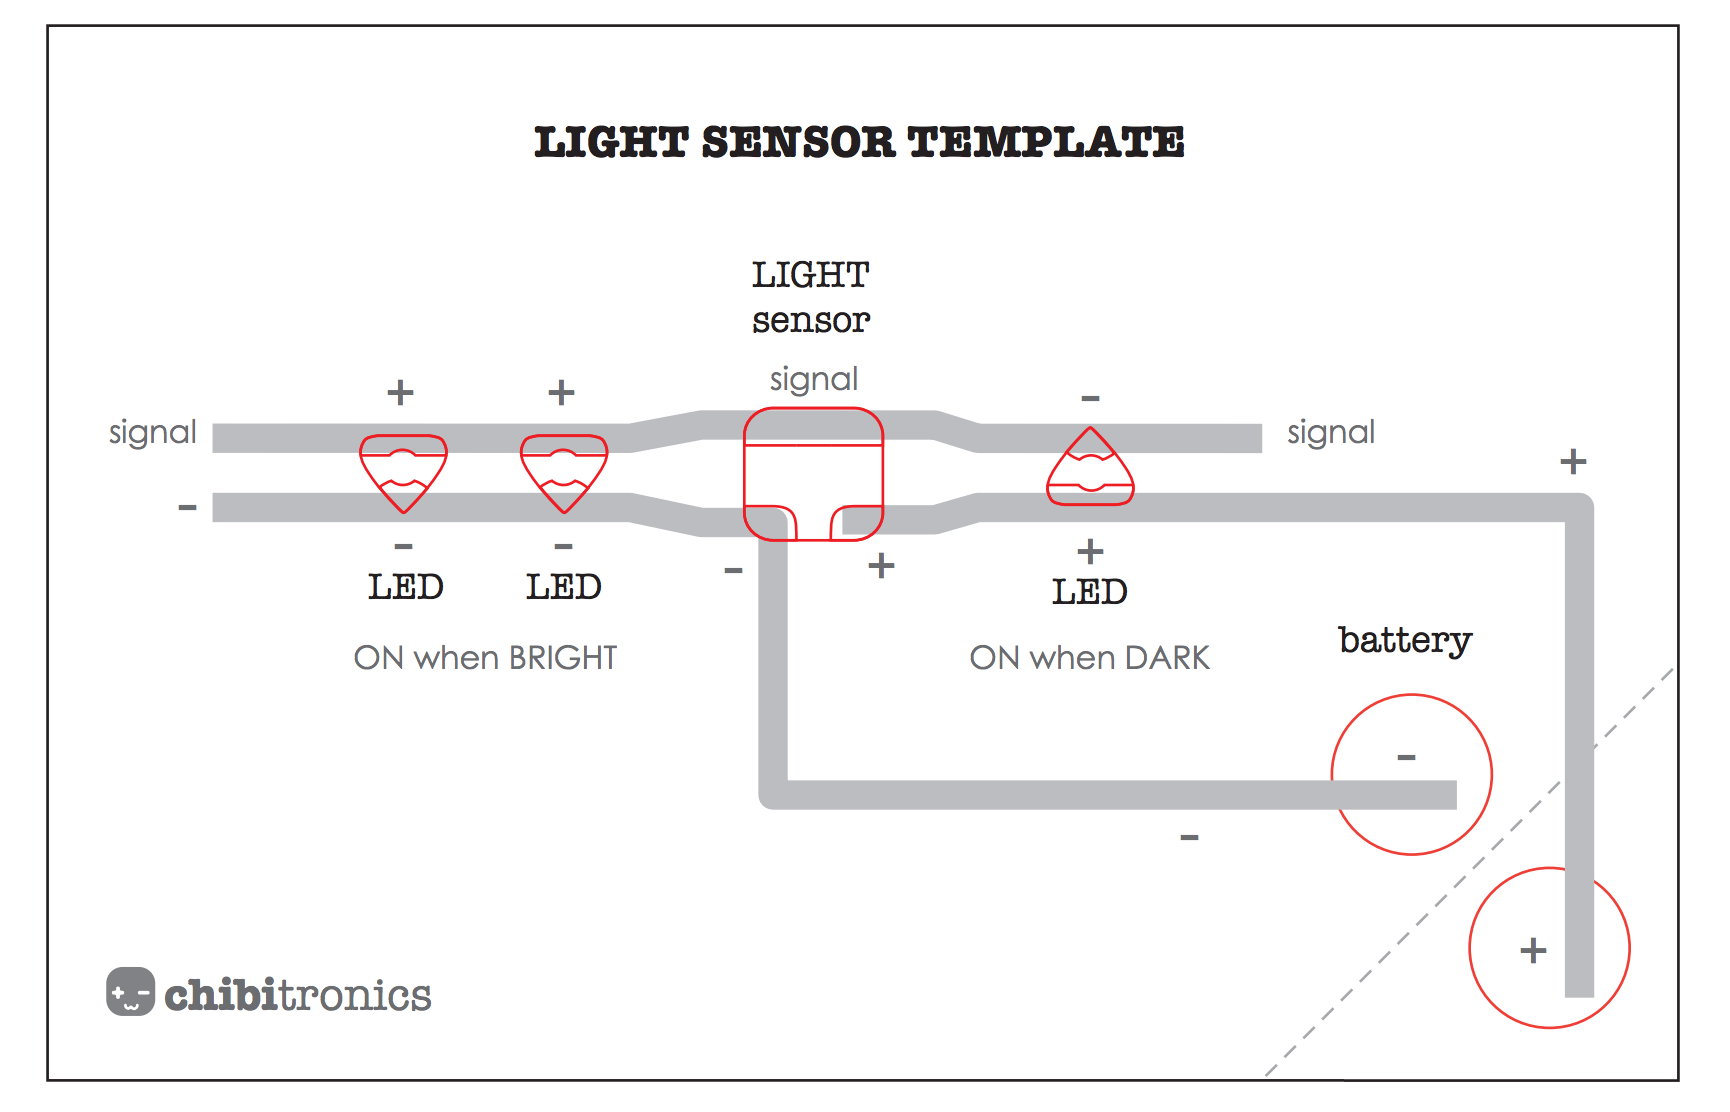
Then cut out the template.
 |
 |
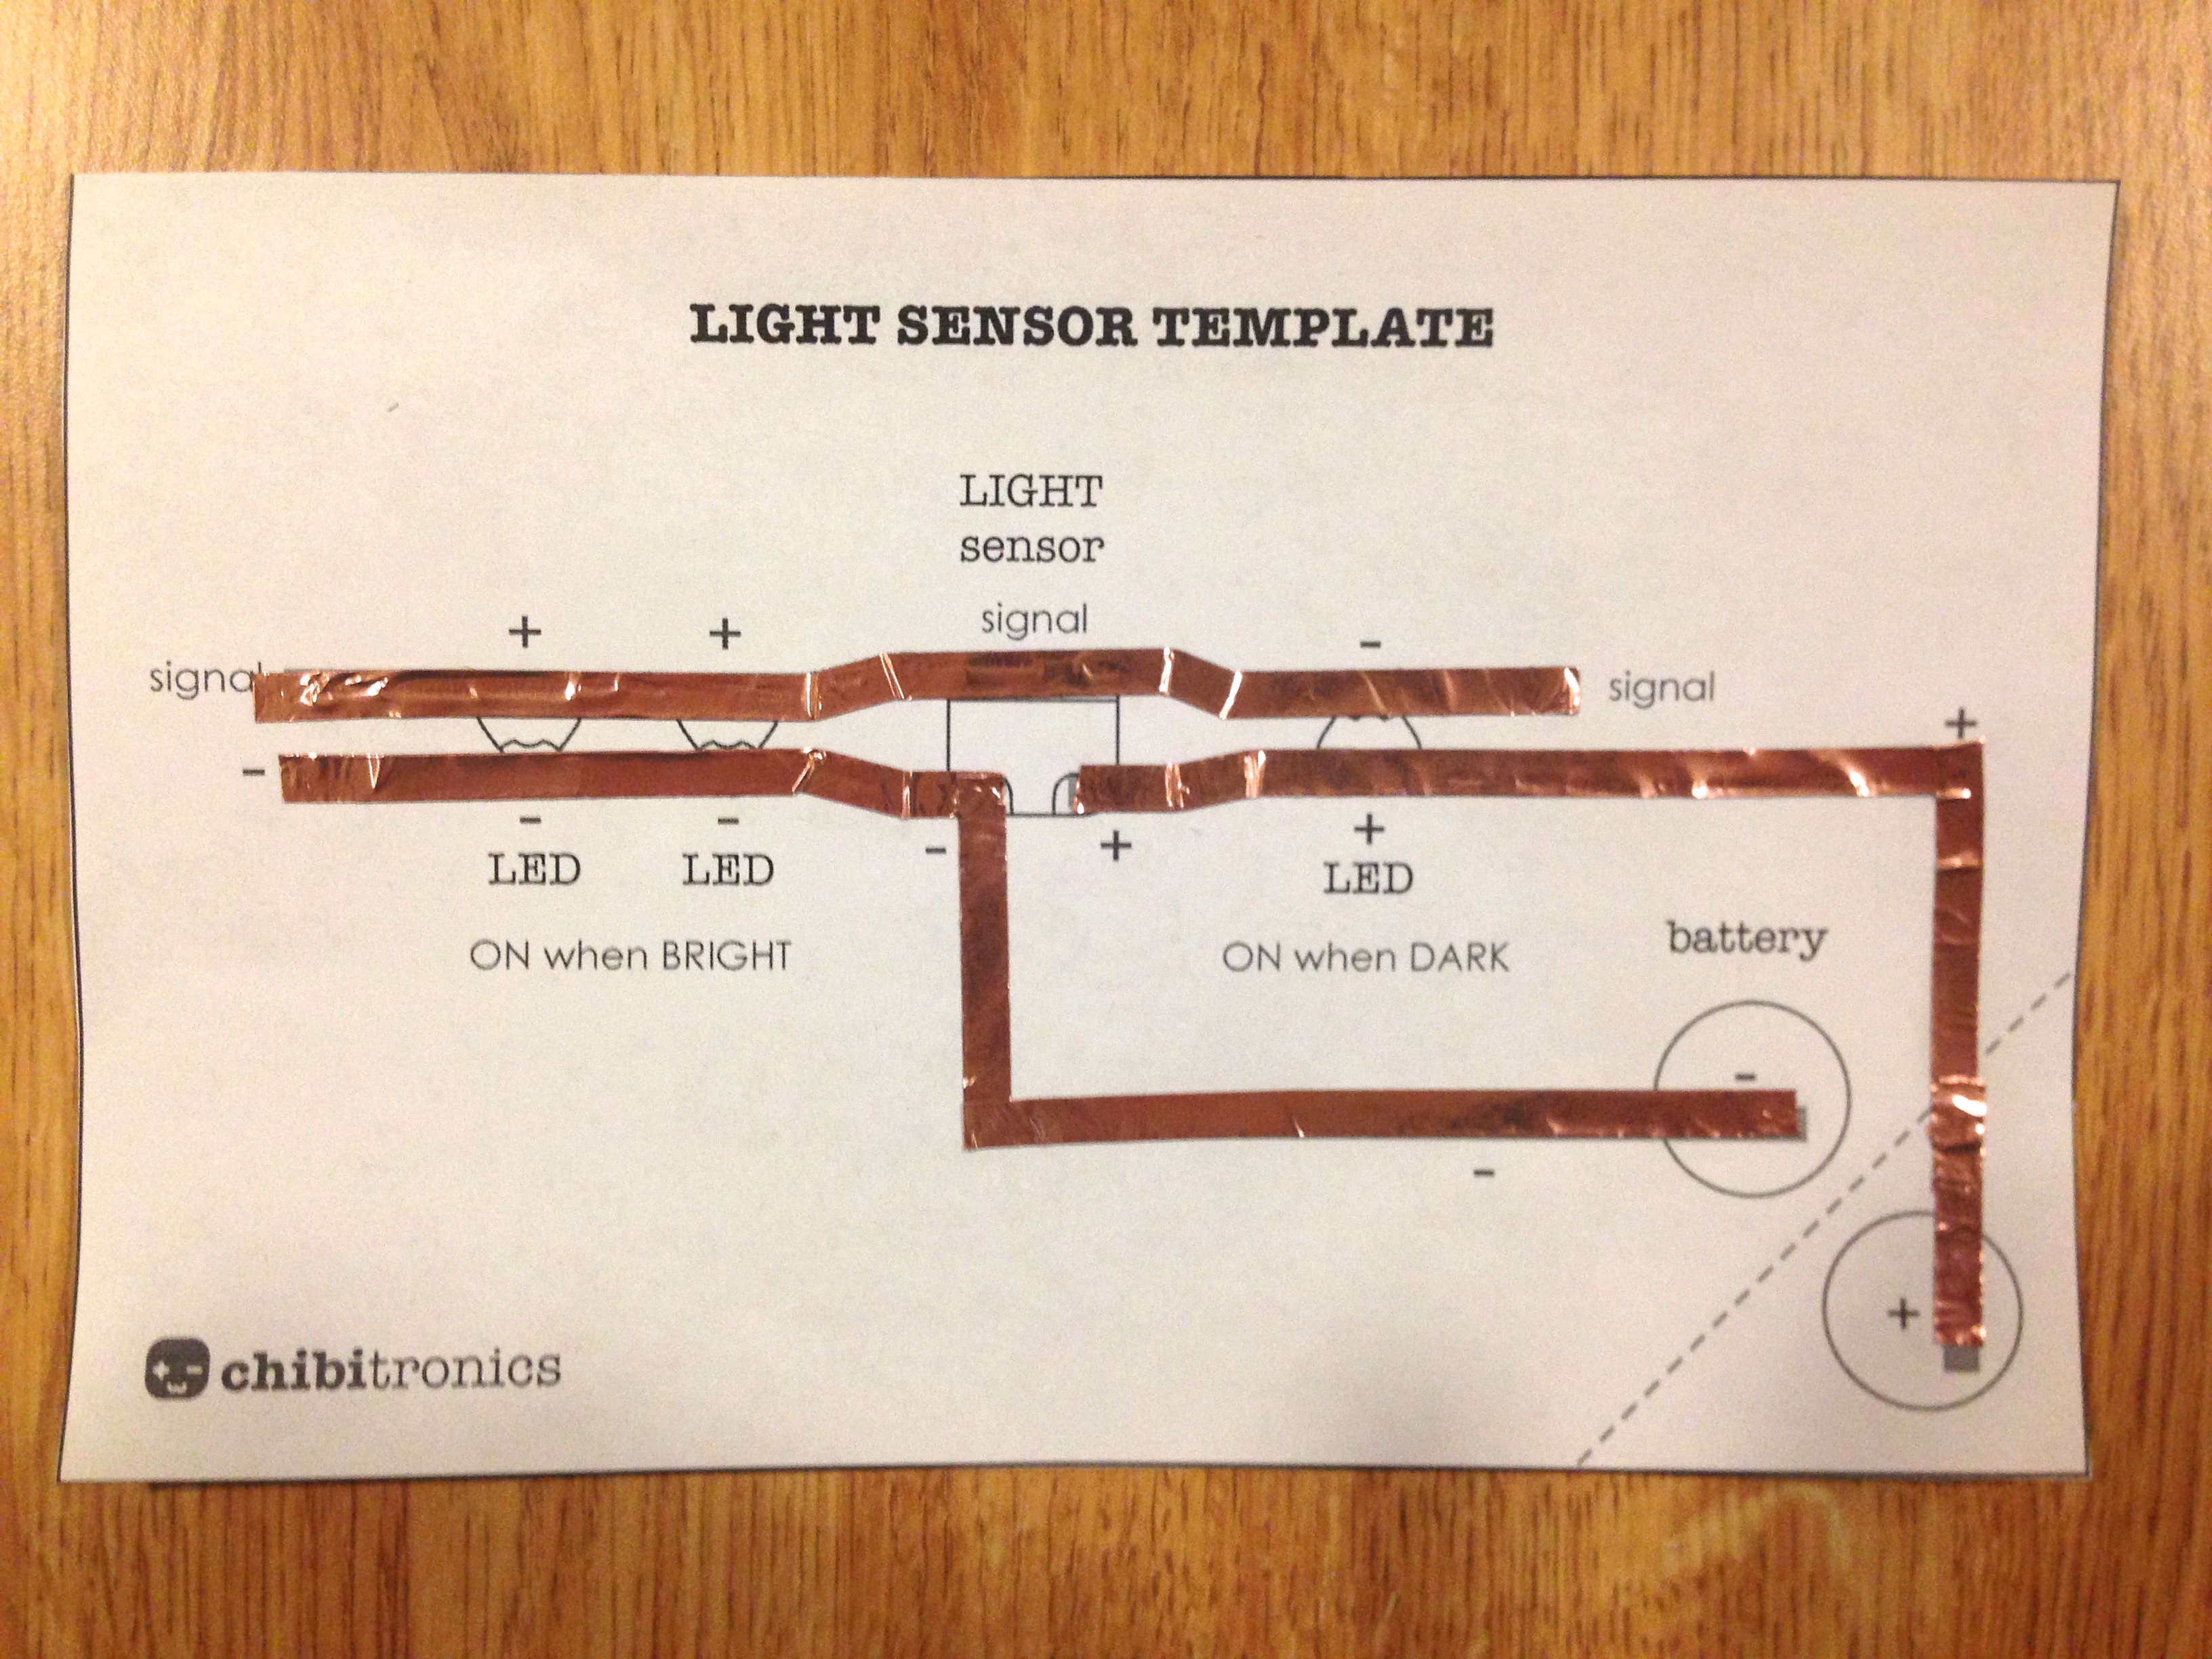
STEP 2: Stick copper tape over the gray lines
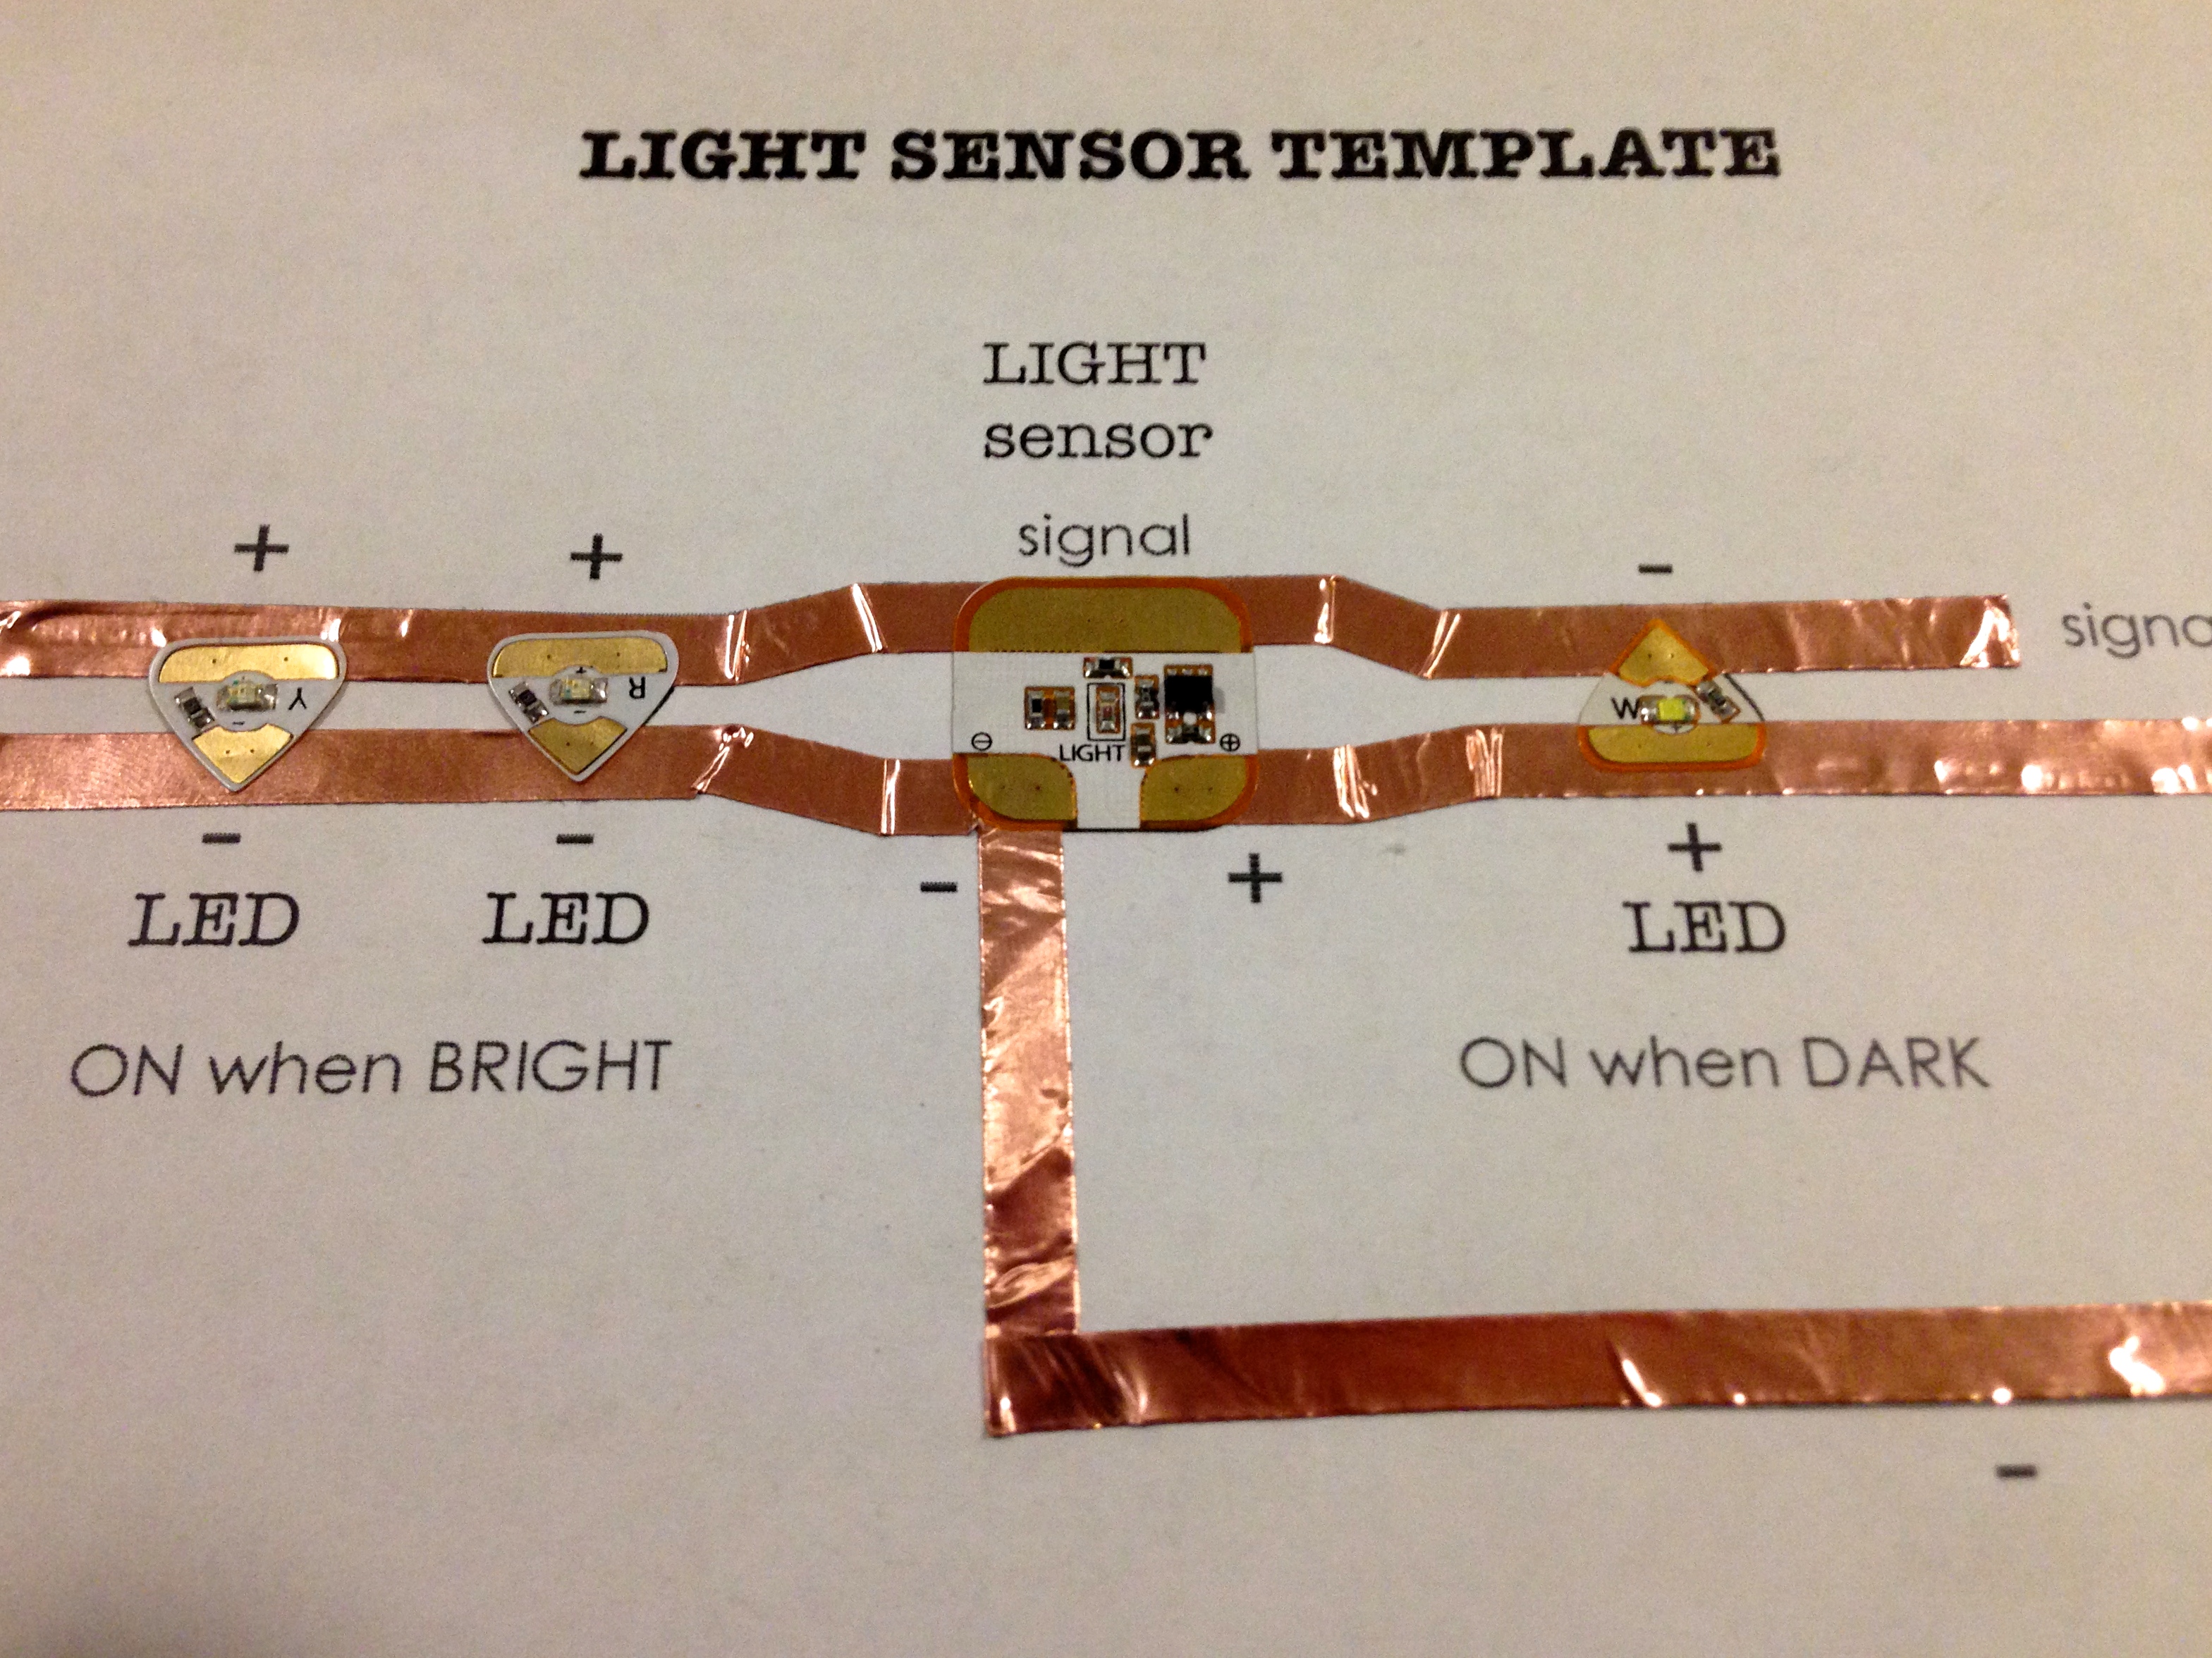
STEP 3: Place the Light Sensor and LED stickers over their respective footprints
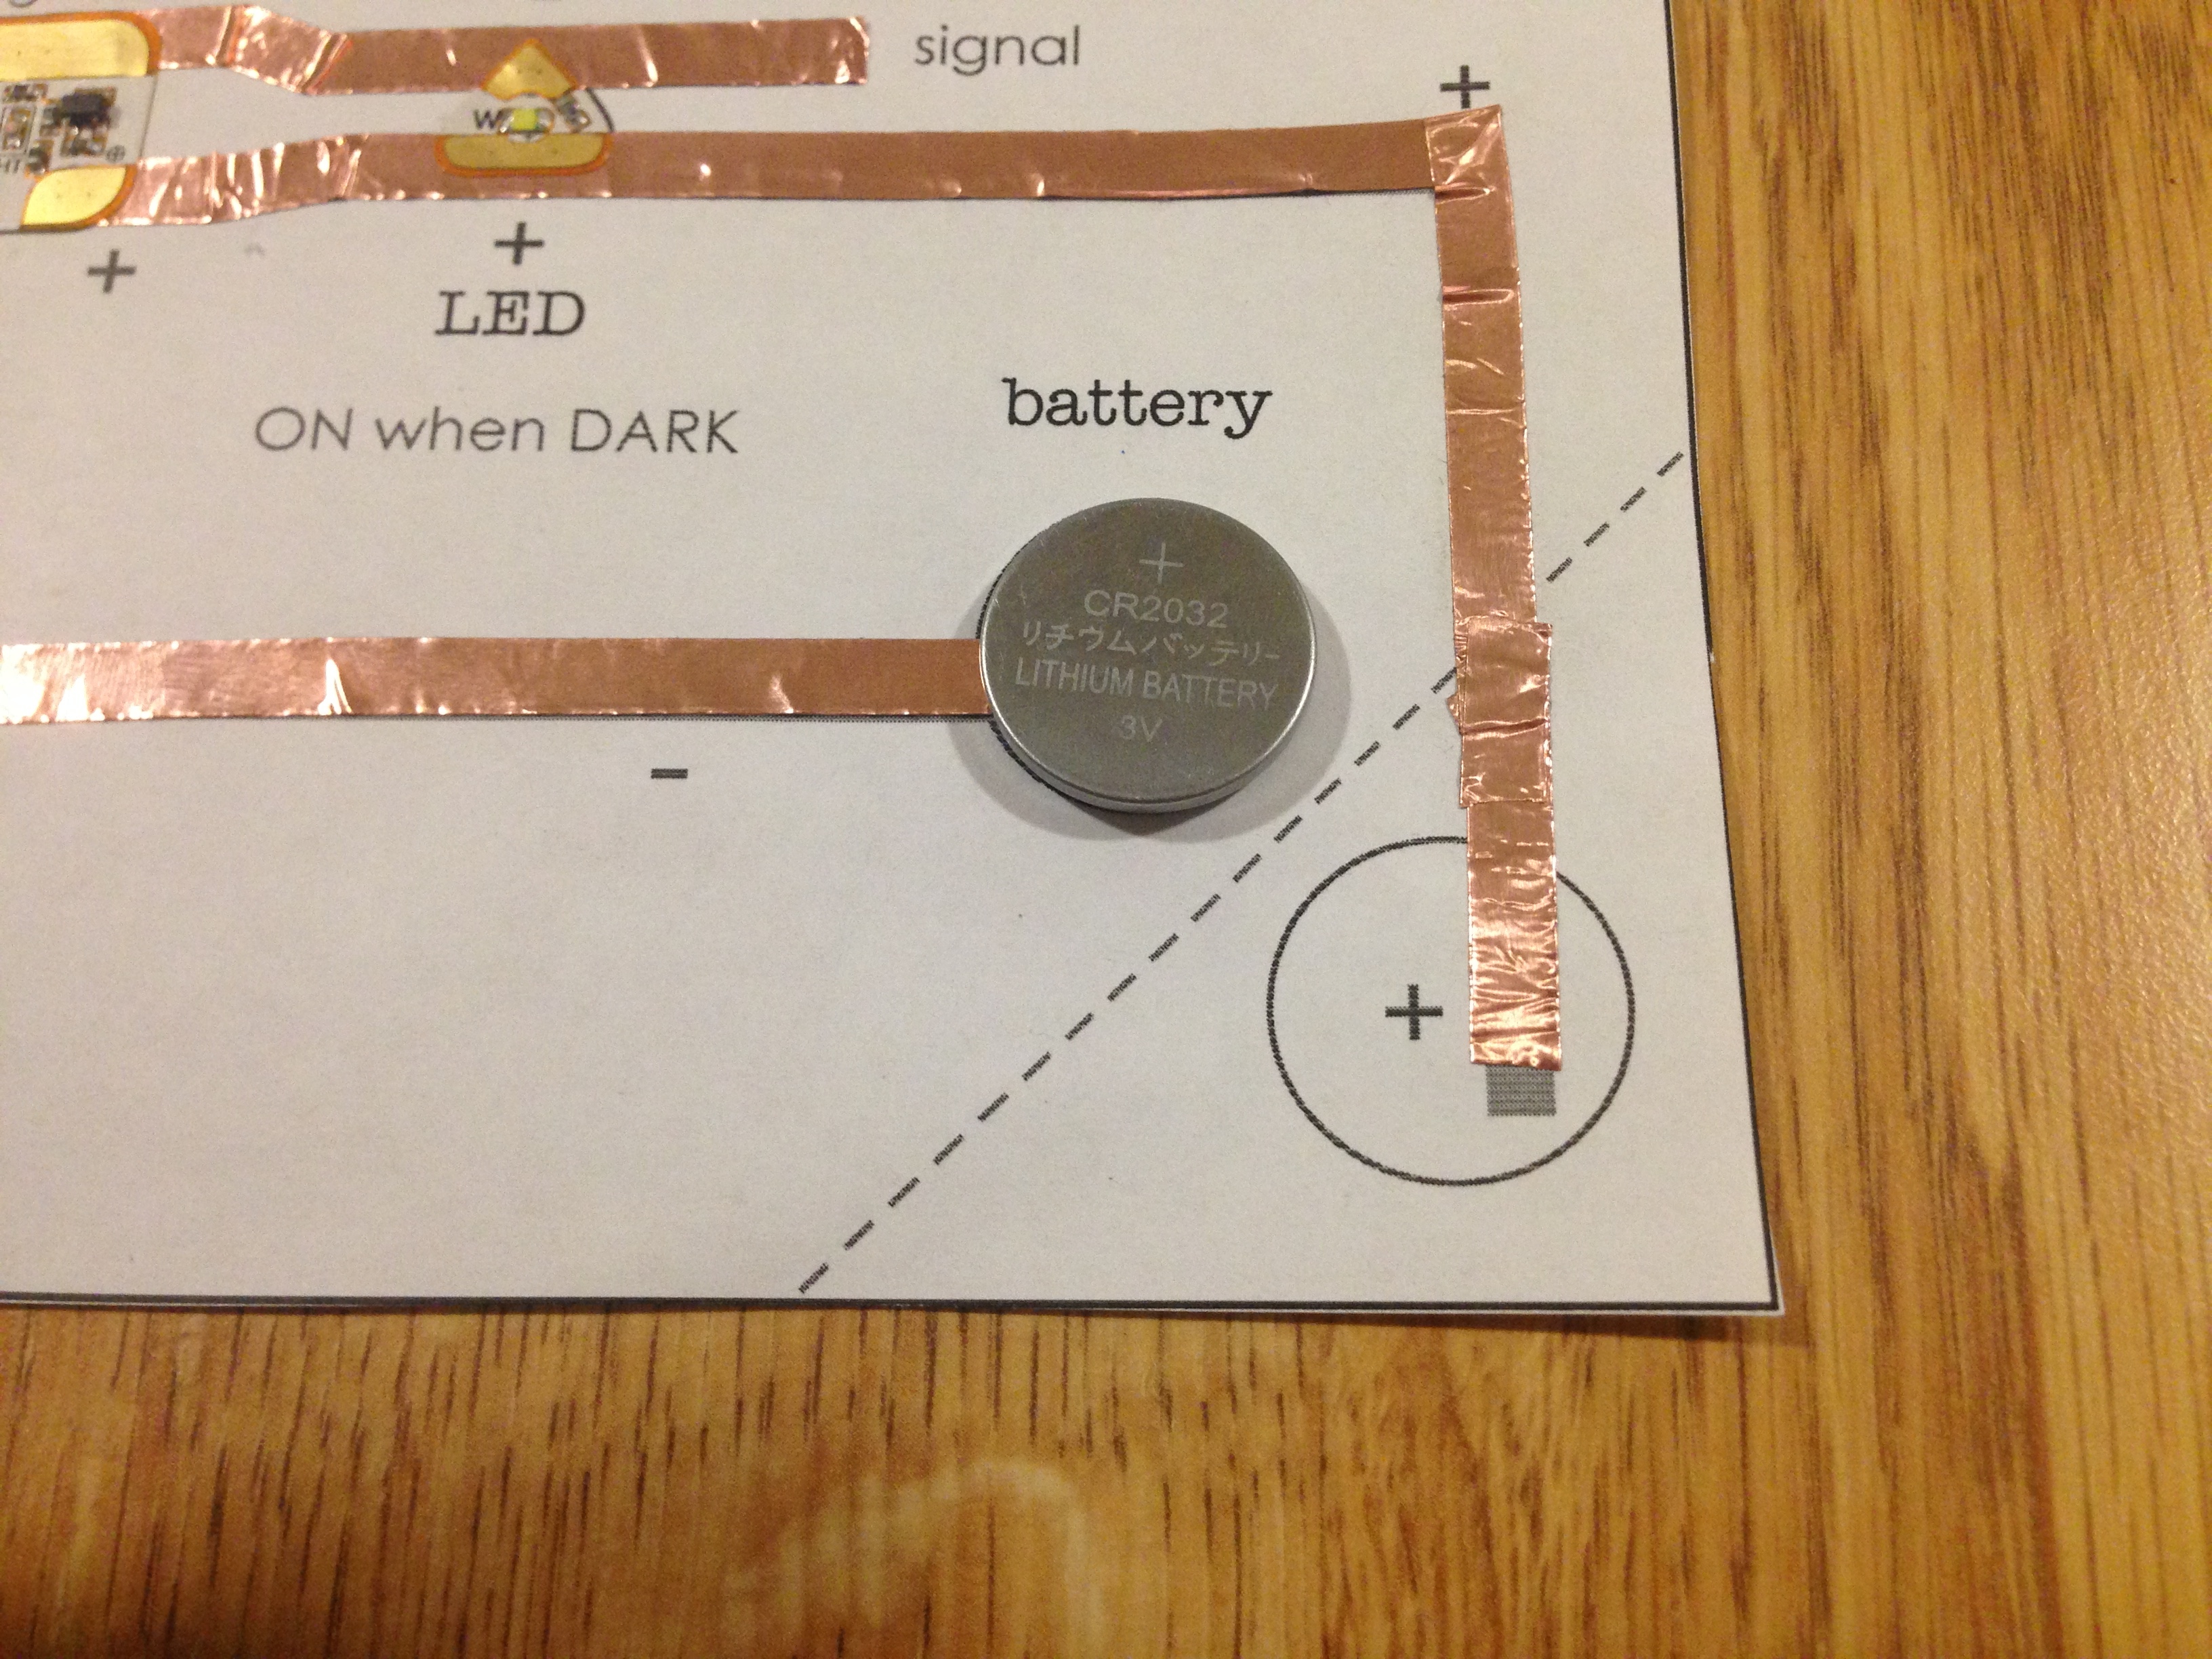
STEP 4: Add the battery. Secure with a binder clip.
 |
|
You’re done! The LED on the right should light up when the sensor is in the dark, and the LEDs on the left should light up when the sensor is exposed to bright light.
Below is a video showing the light sensor in action.